How Bore Inspection with Machine Vision Systems Enhances Defect Detection
In the intricate world of manufacturing—particularly in automotive, aerospace, machinery, and heavy industry—the bore (or inner cavity) of a component is often a critical feature. These cylindrical cavities must meet stringent dimensional and surface quality requirements. Tiny defects inside bores—like cracks, scratches, pitting, or debris—can compromise functionality, cause wear, or lead to catastrophic failures. Traditional manual inspections are slow, inconsistent, and often infeasible for tight geometries. Enter advanced bore inspection—powered by smart machine vision systems and capable defect detection—which delivers speed, precision, and reliability.
Why Bore Inspection Matters
In components like bearings, engine blocks, hydraulic valves, or precision rods, the bore’s quality directly influences performance:
- Even microscopic surface grooves or machining marks can accelerate friction and cause premature wear.
- Subtle dimension variance or out-of-roundness can result in misalignment and operational failure.
- Undetected burrs or debris inside a bore may obstruct fluid flow or damage mating parts.
In short, bore inspection isn’t just another QC task—it’s essential for ensuring component integrity and safety.
What Makes Bore Inspection Challenging?
Inspecting the interior of a bore presents multiple challenges:
- Limited Accessibility: Bores have narrow inner diameters, making direct visual inspection difficult or impossible.
- Complex Geometry: Cylindrical or curved surfaces require specialized imaging techniques for comprehensive analysis.
- Small Anomalies: Micron-level scratches, pits, or residual machining marks require high-resolution inspection.
- High Throughput Demands: Manufacturers need to inspect thousands of parts quickly without bottlenecks.
These constraints make traditional borescopes or manual checks insufficient for modern manufacturing demands.
The Rise of Bore Inspection with Machine Vision Systems
Machine vision systems, especially those powered by AI, have transformed how we inspect bores:
- Borescope Cameras + AI
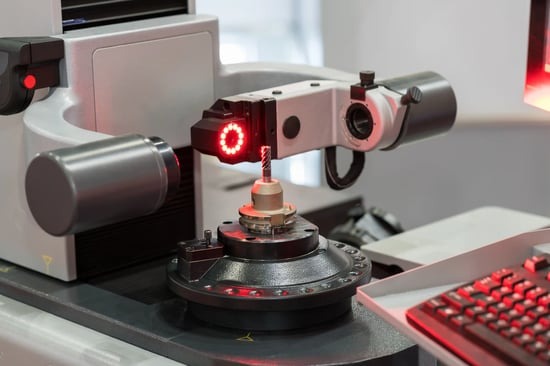
Borescopes, equipped with flexible high-quality optics, gain physical access deep inside cavities. When paired with Intelgic’s AI-driven vision software, real-time image analysis automates defect detection—flagging scratches, cracks, or dimensional variances with precision and speed. - Robotic Arm Automation
Mounted borescopes on robotic arms enable consistent, repeatable imaging across all internal surfaces. Controlled via ROS (Robot Operating System), the system moves precisely inside the bore, capturing every angle under optimal lighting and feeding images into the AI for analysis.
360° Optical Bore Inspection: Inside View Made Easy
Technology like the 360° optical bore inspection system (Visionline B series) offers an advanced approach:
- Uses CMOS sensor arrays to scan the entire inner bore surface in a single rotation.
- Generates high-contrast, distortion-free images of internal surfaces.
- Detects porosity, scratches, cavities—even within production cycles.
- Supports bores from as small as 5 mm up to 68 mm with scalable sensor formats.
Systems like the Hommel-Etamic IPS-10 use a similar ring-arranged sensor to create “unwrapped” images of entire bore surfaces—quickly and reliably.
Adding 3D Precision to Bore Inspection
Beyond surface imaging, some systems offer 3D metrology of bores:
- Low-Coherence Interferometry
BoreInspect systems use rotating optical probes mounted on robotic stages to scan the bore interior at high speed. This produces dense 3D point clouds representing the bore’s interior geometry—including cylindricity, roundness, surface roughness, grooves, and micro-defects—with micron-level accuracy.
Such systems meet strict GD&T criteria and can highlight tiny deviations down to the micrometer.
Implementing Bore Inspection: Workflow Overview
A typical advanced bore inspection setup unfolds in stages:
- Positioning the Sensor
Borescope or 360° camera enters the bore, often via robotic arm. - Illumination Control
Coordinated lighting (ring or angled) ensures uniform coverage and reduces glare. - Imaging Modes
- Surface imaging: 360° unwrapped views
- 3D scanning: rotating probes or interferometry
- Surface imaging: 360° unwrapped views
- AI Analysis & Defect Detection
Software scans for anomalies—voids, scratches, dimensional inconsistencies. - Decision Logic
Parts get marked for pass/fail based on defect criteria. - Reporting and Data Logging
Reports include defect images, coordinates, severity, and timestamps for full traceability.
Real-World Benefits of Smart Bore Inspection
- Time-Saving: Visual scanning that once took minutes is now achievable in seconds.
- Consistency: AI eliminates variable human interpretation across shifts or operators.
- Comprehensive Detection: Micro-defects and surface irregularities are reliably identified.
- Traceability: Digital records support root cause analysis, warranty claims, and regulatory audits.
- Adaptability: Systems can be programmed for various bore sizes, materials, and defect types.
Key Applications across Industries
| Industry | Application Examples |
| Automotive | Engine bores, hydraulic cylinders, valve bodies—ensuring integrity under high heat/pressure |
| Aerospace | Turbine shafts, precision machined cavities—critical for safety |
| Heavy Equipment | Bearings, hydraulic assemblies—ensuring longevity and operator safety |
| Oil & Gas | Downhole tool bores, valve interiors—preventing catastrophic failures |
| Medical Devices | Surgical tool or implant bores—requiring sterilization and defect-free quality |
Future Trends: Smarter and Faster Inspection
- Adaptive Learning: AI models that detect emerging defect patterns over time.
- Edge AI: Real-time decision making directly on vision hardware.
- Hybrid 2D/3D Scanning: Simultaneous surface imaging plus geometrical analysis.
- Remote Monitoring: Web dashboards offering real-time bore quality across sites.
By integrating advanced machine vision systems with defect detection, modern bore inspection solutions are revolutionizing quality control for critical components. Whether through robotic borescope automation, 360° surface scanning, or high-resolution 3D metrology, manufacturers can now ensure bore integrity with precision, speed, and confidence—protecting both performance and reputation.
Let me know if you’d like this article adapted for your blog format or customized further!
