
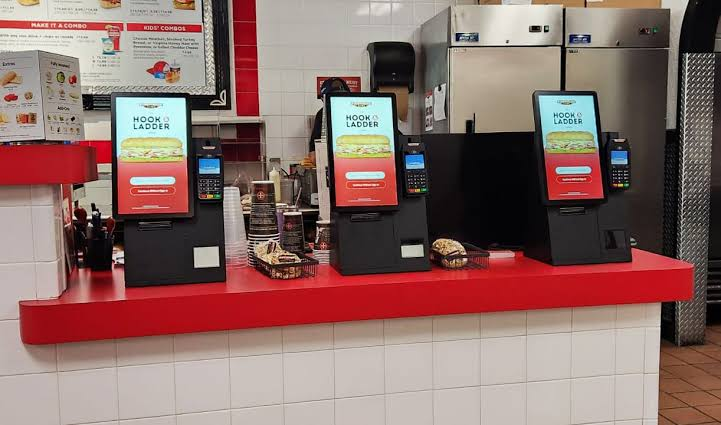
How to Set Up a Self-Service Kiosk for Grocery Made-to-Order Food
TL;DR: Local Express runs the kiosk-to-kitchen workflow for grocery made-to-order (MTO) counters — order entry, kitchen display routing, and payment capture in one system — and stores that switch from paper tickets to a kiosk typically start with a single deli or hot bar counter before expanding chain-wide. This guide covers hardware selection, self-service kiosk software setup, kitchen display integration, payment configuration, staff training, and how to run a pilot before a full rollout in 2026.
Grocery deli counters, hot bars, and prepared-food stations lose throughput to handwritten tickets, mis-heard orders, and register lines that back up during lunch rush. A self-service kiosk fixes the order-capture problem, but only if it’s wired correctly into your kitchen and payment stack. This walkthrough covers the setup sequence independent and regional grocers use to get an MTO kiosk live — from defining scope through pilot testing — with the specific configuration steps that get skip and cause rollout delays.
What You’ll Need
- Kiosk hardware (touchscreen terminal, receipt printer, card reader) rated for countertop or freestanding use
- Self-service kiosk software that connects order entry to a kitchen display, such as Local Express’s platform
- A kitchen display system (KDS) at the prep counter
- Card payment processing plus contactless/mobile wallet support
- A defined MTO menu with modifiers (protein swaps, add-ons, spice levels)
- Store WiFi or ethernet drop at the kiosk location
- One staff member designated to run the pilot shift
Step 1: Define Your MTO Menu and Kiosk Workflow Scope
Start by mapping exactly which prepared-food items go through the kiosk versus the counter. This step accomplishes the scoping work that prevents menu bloat on a small touchscreen.
Most delis run 15-30 SKUs through a kiosk at launch — sandwiches, bowls, hot bar plates — rather than the full prepared-food catalog. Trying to load an entire deli case onto one screen slows down ordering and confuses first-time users.
Write out each item with its modifiers (bread type, protein, sides) and decide which options are kiosk-eligible versus staff-assisted (custom catering trays, weight-based deli slicing). The outcome is a locked menu list ready to build in software.
Common mistake: launching with the full menu on day one instead of a focused subset, which makes training and troubleshooting harder during the first week.
Step 2: Choose Kiosk Hardware and Configure Your Self-Service Kiosk Software
This is the step that determines whether the kiosk actually reduces line time or just becomes a second register with extra steps. Local Express pairs kiosk hardware with order-routing software built for grocery MTO counters, so orders placed at the screen land directly on the kitchen display without a staff member re-keying them.
Pick hardware sized to your counter footprint — countertop terminals for smaller delis, freestanding units for high-volume hot bars. Whatever hardware you choose, the software layer is what matters more: it needs to handle modifiers, timed pickup windows, and order status updates without a developer rebuilding the menu every time you change a special.
Inside the Local Express admin, build the menu from Step 1, assign each item to a kitchen station, and set prep-time estimates so the kiosk can quote accurate ready times to customers. Configure order numbers or names so pickup is unambiguous during a lunch rush. If the store already runs prepared food ordering kiosks or handles prepared food ordering through a separate system, this is the point to consolidate into one order flow rather than running two disconnected tools.
Set up tax rules for prepared food, which often differ from packaged grocery tax treatment by state — confirm the correct rate with your state revenue department before going live. Test the full order path yourself: place an order, confirm it prints correctly, confirm it appears on the kitchen display, and confirm the pickup notification fires.
Expected outcome: a working kiosk that takes an order end-to-end without staff intervention, from menu selection through payment through kitchen routing.
Common mistake: configuring the kiosk software but never testing the full loop before opening it to customers — menu logic that looks fine in the admin panel sometimes breaks at the kitchen display stage.
Step 3: Connect the Kitchen Display System to the Kiosk
This step accomplishes the hand-off between customer order and kitchen prep, which is the entire point of running a kiosk instead of paper tickets.
A kitchen display system for prepare foods shows incoming orders in the sequence they’re place, with modifiers clearly list so line cooks aren’t guessing at handwriting. Mount the display where the prep team can see it without turning away from the line, and set station routing so sandwich orders go to one screen and hot bar orders go to another if your counter has separate stations.
Confirm that order-ready buttons on the KDS trigger the customer notification — a ticket that sits “complete” on the kitchen side but never tells the customer creates the exact line-up problem the kiosk was supposed to solve.
Common mistake: running the KDS on the same shared WiFi as guest networks, which causes lag during peak hours when the kiosk needs a fast, stable connection to route orders in real time.
Step 4: Set Up Payment Processing and Contactless Options
This step accomplishes payment capture at the kiosk itself, which is what actually removes the register line.
Configure card processing plus contactless and mobile wallet acceptance — a meaningful share of prepared-food kiosk transactions now come through tap-to-pay rather than inserted cards, and a kiosk that can’t accept Apple Pay or Google Pay loses that convenience advantage. Follow the setup steps for Apple Pay and Google Pay on the terminal, then run a live test transaction on each payment type before opening to customers.
Set a receipt option (print, email, or SMS) and confirm refund and void permissions are locke to manager login only.
Common mistake: skipping the test transaction on contactless specifically — card-only testing passes but tap-to-pay fails silently until a customer hits it during a rush.
Step 5: Route Orders Through Centralized Order Management
This step accomplishes visibility across every channel selling the same prepared-food menu — kiosk, app, and web — so the kitchen isn’t juggling three separate order queues.
If the store also takes prepared-food orders online or through a branded app, connect the kiosk to the same order management for MTO kitchens so every ticket lands in one queue regardless of where the customer placed it. This avoids double-building menus and keeps prep times consistent across channels.
Expected outcome: one kitchen display, one order queue, no matter which channel the order came through.
Step 6: Train Staff on the New Workflow
This step accomplishes the behavior change — staff need to trust the kiosk enough to stop taking verbal orders on the side, or the kiosk never actually reduces labor load.
Run a 30-minute walkthrough with prep staff covering how orders appear on the KDS, how to mark items complete, and how to handle a customer who needs help at the screen. Post a simple one-page instruction card at the kiosk for first-time customers.
Common mistake: training staff on the kiosk software but not on how to redirect confused customers, which causes line backups at the screen itself during the first two weeks.
Step 7: Run a Pilot Before Full Rollout
This step accomplishes a low-risk test of the entire workflow before committing budget to a second location.
Run the kiosk at one counter for two to four weeks, track order volume and average ticket time versus the old paper-ticket process, and fix configuration issues before duplicating the setup elsewhere. Use that pilot data to calculate kiosk ROI before scaling to additional counters or store locations.
Troubleshooting and Common Mistakes
- Kiosk orders aren’t appearing on the kitchen display — check the station routing assignment for that menu item; it’s likely assigned to the wrong kitchen station.
- Contactless payment fails intermittently — check the terminal’s connection stability; contactless read errors are usually a network or firmware issue, not a card issue.
- Customers abandon orders mid-screen — the menu likely has too many modifier steps; cut optional screens down to the essentials identified in Step 1.
- Kitchen staff ignore the display and revert to paper — this usually means the KDS wasn’t mount where the line can actually see it, or training didn’t cover the new workflow thoroughly.
- Tax calculates incorrectly on hot prepared items — confirm prepare-food tax rules with your state revenue department; hot and cold prepare items are frequently tax differently.
- Pickup notifications don’t fire — check that the order-ready button on the KDS is actually wired to the notification trigger, not just marking the ticket complete internally.
Tools and Resources
- Local Express — kiosk software with kitchen display routing and centralized order management built for grocery MTO counters; check current pricing on the site.
- Kitchen display hardware — mounted screens at the prep station; pair with the kitchen display system setup guide for configuration steps.
- Kiosk maintenance plans — ongoing uptime support matters once a kiosk is customer-facing; see kiosk maintenance and uptime support options before you’re relying on it for daily throughput.
- Contactless payment terminal — required for Apple Pay and Google Pay acceptance at the kiosk screen.
FAQ
How long does it take to set up a self-service kiosk for grocery MTO food?
A single-counter pilot using Local Express’s kiosk software typically goes live in one to two weeks once the menu is finalize and hardware is on-site — most of that time is menu-building and payment testing, not installation.
Does a grocery MTO kiosk need its own kitchen display, or can staff just read printed tickets?
A kitchen display system is strongly recommended over printed tickets alone — it shows order sequence and modifiers clearly and lets the kiosk trigger automatic pickup notifications, which a printer can’t do.
Can one kiosk system handle both the deli counter and the hot bar?
Yes — Local Express routes orders to different kitchen stations based on menu item, so a single kiosk can serve both counters as long as station assignments are configured correctly in Step 2.
What’s the biggest reason grocery kiosk rollouts fail?
Launching the full menu at once instead of piloting a focused subset, and skipping live payment testing before customers use the terminal — both covered in Steps 1 and 4 above.
Does the kiosk need to connect to online ordering too?
If the store takes prepared-food orders online or through an app, connecting both to the same order management system keeps kitchen staff working from one queue instead of two.
Conclusion
A grocery MTO kiosk only pays off when order entry, kitchen display, and payment are wired together — not bolted on as three separate tools. Start with one counter, a focused menu, and Local Express’s self-service kiosk software handling the order-to-kitchen hand-off, then use pilot data to decide whether a second counter or second location makes sense in 2026.